
[ad_1]
Learn how to make a batch of healthy, homemade Uncrustables to stash into the freezer for fast kids lunch ideas. I love this method so much because you can decide exactly what to put inside, they’re crazy fast, AND they freeze beautifully. (Plus, you can adjust for allergies as needed!)
Uncrustables
Before becoming a mom to three kids, I would have laughed in your face if you told me that I’d ever make pb&j sandwiches ahead of time to stash into the freezer. Ah, but then life happened and I realized that having such a simple food ready and waiting in the freezer for easy meals is actually GENIUS.
You can pull them out and pack in a lunch and they’ll thaw by lunch time, you can fill them with anything you want (so they are easy to adjust for allergies or preferences), and you can make them with any kind of bread you like. Win!
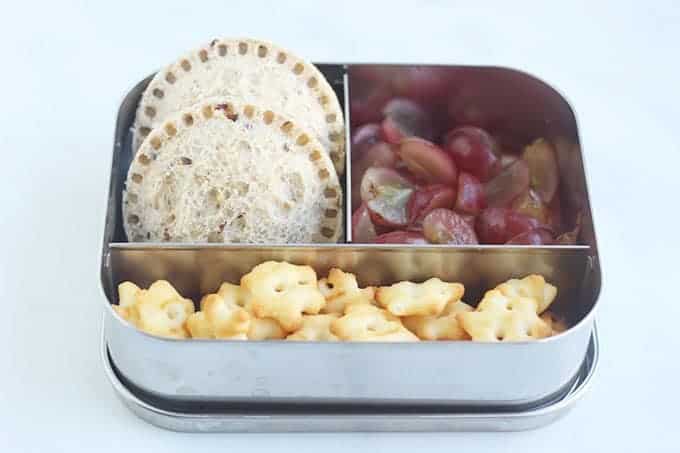
TIP: The stainless lunchbox shown here is from Lunchbots. It’s a great size for a younger toddler. The sandwiches are paired with halved grapes and Imagine brand Cheese Stars.
Wait—what’s an Uncrustable?
If you’re new to this term, an Uncrustable is a pb&j sandwich, without crusts, that Smuckers has made for us and sells in a box in the freezer aisle. So handy! But they’re such a simple thing that I like to make them at home with a little bit more nutrition than the boxed variety. (No shame if you buy them though!)
Ingredients You Need
To make these sealed crustless sandwiches, you’ll need:
- Bread (preferably whole grain)
- Filling such as pb&j, jam, sunflower seed butter and jam, or even cream cheese and jam
- Sandwich Sealer or a fork and a round cookie cutter
TIP: I’m going to show you how to make them with both a Sandwich Sealer and a fork. I think the sealer method is easier and seals them more firmly, but a fork works too.
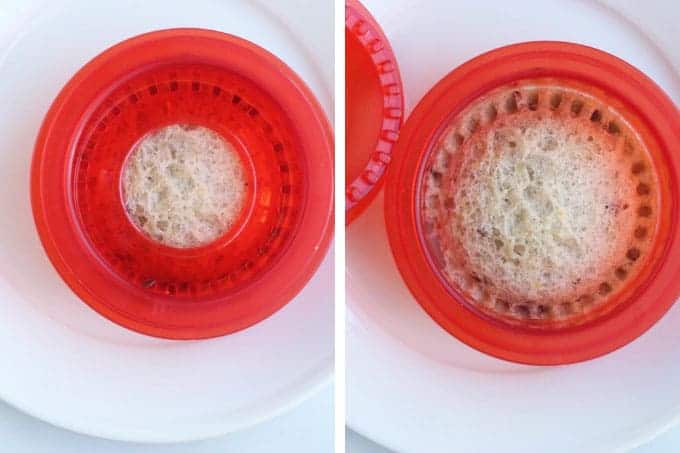
Step-by-Step Instructions with a Sandwich Sealer
Here’s a look at how to make these kids sandwiches using this handy tool.
- Get yourself a Sandwich Sealer.
- Stack two pieces of bread and press the outer round down to cut rounds. If the bread is at all dry, warm it briefly.
- Add your fillings.
- Put the round back around the bread, then press down with the smaller insert to crimp the edges.
TIP: You can find these sealers in all shapes and sizes, so be sure to read the description to make sure it’s not too giant! This is the one I have.
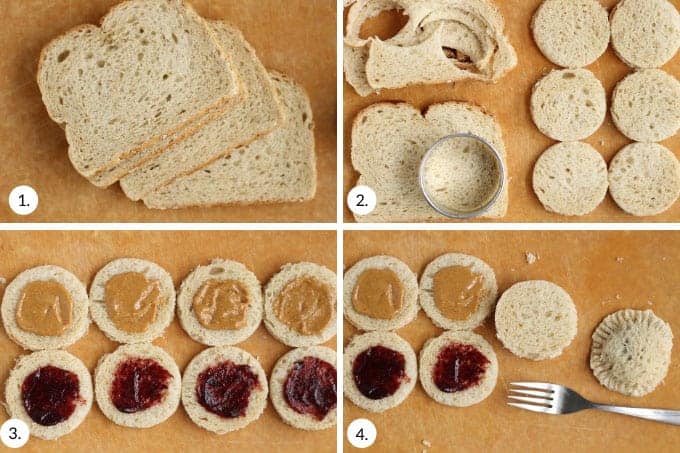
Step-by-Step Instructions with a Fork
If you don’t have or want a sealer, I get it. Here’s how to make these using a fork. Scroll down to the bottom of the post for the full information.
- Place your bread on a cutting board.
- Cut out rounds using a cookie cutter.
- Add fillings in the center.
- Assemble sandwiches, then crimp the edges of the bread together, pressing hard.
TIP: This works best if the bread is warmed up slightly. I usually do 5-10 seconds in the microwave.
Filling Ideas
There are so many options but these are my favorites:
- pb&j
- Sunflower seed butter and jam
- Apple butter and nut or seed butter
- Apple butter
- Jam
- Cream cheese and jam
- Chia seed jam
- Sweet potato puree and almond butter
TIP: You could even try a little turkey and cheese, cheese, or another savory filling if you wanted to get more creative!
Tips for Storing in the Fridge or Freezer
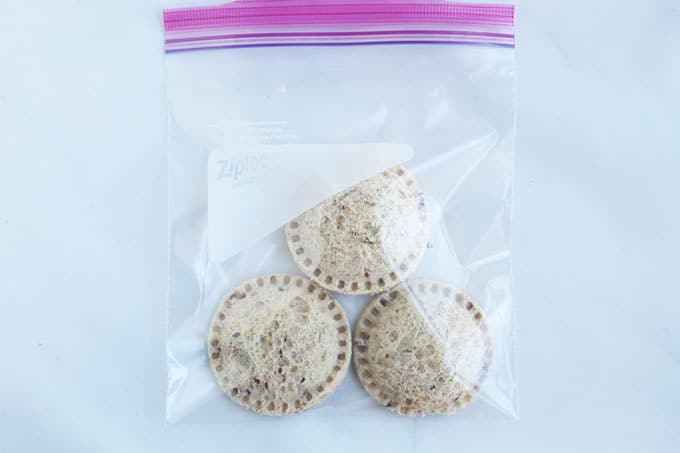
You can serve them right after making or add to a freezer bag and freeze for up to 3 months. Try to remove as much air as possible from the bag, which will help them from getting any ice crystals.
You can also wrap each one in plastic wrap to help ensure that they stay super fresh, then freeze in a freezer bag.
Tips for Making the Best Uncrustables
- You can serve them right after making or add to a freezer bag and freeze for up to 3 months. You can also wrap each one in plastic wrap to help ensure that they stay super fresh, then freeze in a freezer bag.
- Try filling such as pb&j, jam, sunflower seed butter and jam, or even cream cheese and jam. Or go savory with turkey and cheese.
- I prefer to use soft whole grain sandwich bread.
- I find that the bread seals best if the bread is warmed up slightly. I usually do 5-10 seconds in the microwave.
- Sandwich sealers come in all shapes and sizes, so be sure to read the description to make sure it’s not too giant! This is the one I have.
- Pack or serve for lunch with simple sides like fruit, crackers, cheese, or veggies.
- Gluten-free: Use a favorite soft gluten-free bread.
- Nut-free: Use sunflower seed butter in place of peanut butter.
- You may also like my Favorite Kids Sandwiches, Wraps for Kids, and easy Summer Lunch Ideas.
If you try this kids sandwich idea at home, please let me know how it goes. I always love to hear your feedback and it helps me to keep improving my content for you!
This post was first published August 2020.

Easiest Homemade Uncrustables
You can make one sandwich at a time, or make a batch of a few to stash in the freezer. Adjust this as needed for your preference.
Ingredients
- 8 slices soft whole grain bread
- About 1-2 tablespoons filling of choice such as pb&j jam, sunflower seed butter and jam, or even cream cheese and jam. Or go savory with turkey and cheese.
- Sandwich sealer or fork
Instructions
-
To make with a fork: Warm the bread in the microwave briefly for about 5 seconds. Place your bread on a cutting board. Cut out rounds using a round cookie cutter (3-4 inches is usually a good size). Add your fillings, leaving some space around the edges of the bread so the filling doesn’t seep out. Assemble sandwiches, then crimp the edges of the bread together with a fork, pressing hard.
-
To make with a Sandwich Sealer: Warm the bread in the microwave briefly for about 5 seconds. Stack two pieces of bread and press the outer round down to cut rounds. (Or according to the directions of the sealer if you use a different kind than I have.) Add your fillings, leaving some space around the edges of the bread so the filling doesn’t seep out. Put the round back around the bread, then press down with the smaller insert to crimp the edges.
-
Serve or freeze for later.
Notes
- You can serve them right after making or add to a freezer bag and freeze for up to 3 months. You can also wrap each one in plastic wrap to help ensure that they stay super fresh, then freeze in a freezer bag.
- To pack a frozen sandwich, simply place it in a lunchbox in the morning and it will thaw by lunchtime.
- Try filling such as pb&j, jam, sunflower seed butter and jam, or even cream cheese and jam. Or go savory with turkey and cheese.
- I prefer to use soft whole grain sandwich bread.
- I find that the bread seals best if the bread is warmed up slightly. I usually do 5-10 seconds in the microwave.
- Sandwich sealers come in all shapes and sizes, so be sure to read the description to make sure it’s not too giant! This is the one I have.
- Pack or serve for lunch with simple sides like fruit, crackers, cheese, or veggies.
- To use the leftover crusts, cut into smaller pieces and serve with a dip, use in a French Toast casserole, or use in Baked French Toast.
Nutrition
Calories: 213kcalCarbohydrates: 32gProtein: 9gFat: 6gSaturated Fat: 1gPolyunsaturated Fat: 1gMonounsaturated Fat: 3gSodium: 264mgPotassium: 199mgFiber: 4gSugar: 9gVitamin A: 2IUVitamin C: 1mgCalcium: 65mgIron: 2mg
[ad_2]
Source link